7 Tricks To Help Make The Greatest Use Of Your Composite Door Handle Replacement
How to Replace a Composite Door Handle Door handles can make a huge impact on the appearance of your composite or UPVC doors. There are many different handles available, regardless of whether you want a heritage antique stainless steel or black set. Changing your door handle is easier than you might expect. Follow these steps and you'll have your new door handle in a matter of minutes. 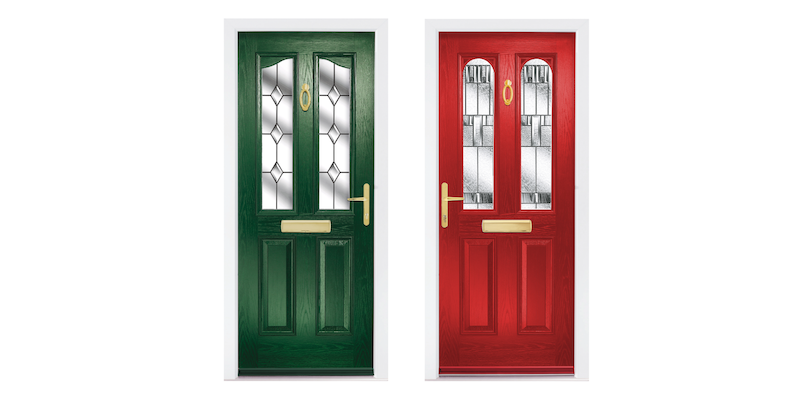 1. Measure the Door The first step to replacing a composite handle on the door is to determine its exact size. This can be done by taking measurements of the handle. The measurements you must make are the centre of the spindle hole (also known as the PZ measurement) and the centers of the Euro hole in the cylinder. Once you've got the measurements, you can start shopping for a handle. There are many handles to choose, so make sure you choose the one that's best suited to your home and style. The choice of the perfect door handle isn't just about appearance – it's also about function and security. When looking for a replacement door handle, make sure that you measure the door opening and not the brick opening. This will provide you with the most accurate measurements of the handle, and also ensure that it is sized correctly. Additionally, you must be aware of the door's backset. This is the distance from the middle of a handle bore hole to the edge of the door. Most uPVC doors come with 2-3/8” or 2-¾” back sets Be sure to choose a handle that has the correct backset for your door. There are a variety of ways to measure a door handle. The most popular method is with the use of a tape measure. Make composite door handle replacements to use a calibrated measuring tape for the best results. It is important to keep it in mind that sizes are measured in millimetres. After determining the measurement, you will have to decide if would like to replace the handle only or the entire set. It's typically easier to replace the entire handle set than just the handle. This could save you money over time. After you've removed the handle that was previously used, it's time to install the new handle. The process is quite easy, and the result will be flawless. Be careful not to loose any screw and ensure that all components are lined up correctly. Once the new handle is in place it's a good idea test its operation by dragging it up and down as well as locking and unlocking it. 2. Remove the handle that was previously used The door handle is an important element of a door, which provides style and function. If your handles are damaged or old, or deteriorated, replacing them is a simple and relatively quick project that can make a big difference to the appearance of your home. Before you can put in a replacement handle, you must first remove the old one. Make sure that the holes are big enough to accommodate the new handle. You can easily remove the mounting screws on the majority of door handles. Different designs, however, are more difficult to get off. Find a small opening in the neck of the handle typically near the point where the base and latch plate. You can take the handle off using an screwdriver, or a small Allen wrench. When you do this, be cautious as the latch plate and handle could fall out of the door hole. If this happens, grab two pieces of half-circle cardboard (not box cardboard however, but not construction paper also) and place them in the holes that you made when you removed the bolts. This will prevent the latch and handle plates from falling to the bottom of your door. If the handle isn't fixed to the lock, it could be secured with pins. It may also become a hole that is above the lock mechanism. In these instances you'll have to remove the entire rose or cover plate first, and then the handle itself. Some handles have a screw holding the latch plate in position that can be removed. After you've removed the handle that was previously used, you should see a series of holes in the door slab that are similar to the size of the latch plate that is set in the door jamb. To avoid repeating this step, select a handle that matches the latch plate size. It is also important to double-check that the strike plate, which is set into the door jamb and holds the latch when closed, fits with the handle you choose. 3. Install the new Handle The front door handle is a crucial part of the house as it allows you access to your home and also provides security for your family members. If the handle starts to lose its shine or becomes difficult for you to operate, it's time to replace it. It is easy to replace your door handle whether it's to improve the appearance of your home or it has been damaged. You don't need an expert to do it. Before you begin the replacement, make sure the door is open by using a door stop, or other device you have at home to prevent the door from closing while you work on it. This will prevent the door from shutting on you as you try to put in the new handles, and it will make the process a lot easier. When you have secured the door open, you'll be required to remove the screws that hold the current knob in place. They will typically be on the inside of the door and may be covered by a cover plate for aesthetic purposes. After the screws are removed, remove the old handle and make sure that the holes are not blocked. The spindle of the new door handle should be inserted into the hole to allow it to be seen on the opposite side. Make sure that the screw holes on the handle match the holes on the door, and that it is pointed in the right direction. If the handle is a lever, this must be installed with the open end facing the hinges on the door or if it's a doorknob, this is required to be installed with the closed end facing away from them. You'll also need to choose the right door handle that is made of composite. The most common type of handle will be one with two holes on each side, which can be used on left and right-handed doors. You'll need to measure the distance between the door's edge and the center of knob opening. This is called the backset. Be sure that your new handle matches the measurement. 4. Secure the Door There are many reasons why you may want to replace your door handle, regardless of whether it's due to the wear and tear or simply because it's not looking as good as it used to. It could be a sign it's time to upgrade to something more modern or sophisticated. It's a fast and easy process that can be completed in a short time. There are a variety of handles available, so it is crucial to pick the right one for you. It is popular to choose a lever lock or lever because it offers excellent security and is simple to use for users. It is often paired with a multi-point automatic lock or slam shut locking system for additional security in the event of a break-in. Another option is to pick a long bar handle. This handle is more decorative and is usually used with a mortice lock and night latch for extra security. This handle is typically found on exterior doors, and provides a chic and striking look to your home. They are also popular due to the fact that they provide a level functionality that makes it easier to secure your home. They are made up of an exterior handle, a thumb-operated latch and dead bolt. Installation is simple, since they are able to use existing holes. It is essential to check the new handle for proper functioning before leaving the house. Check that it is moving without jamming or lag and that the bolt is securely secured. Close and open the door several times to make sure that it is secure. In the event of a crisis, a simple chair can be used as a temporary barricade to secure the door. Find a chair to fit under the handle and then wedge it in. This method might not be as efficient as other methods however it's a good alternative to keep your home secure.